Connecting your HP printer to Wi-Fi not only eliminates the need for messy cables but also enables convenient printing from multiple devices. In this step-by-step guide, we’ll walk you through the process of how to setup HP printer to wifi, ensuring you can enjoy wireless printing with ease.
Step 1: Gather Your Essentials
Before we begin, make sure you have the following items ready:
- Your HP printer with built-in or external Wi-Fi capability.
- A Wi-Fi network with an active internet connection.
- A computer or mobile device connected to the same Wi-Fi network.
- The power cable for your HP printer.
Step 2: Prepare Your Printer
- Plug in your HP printer and turn it on. Allow it to complete its initial setup and warm-up process.
- Ensure your printer has sufficient ink or toner and is loaded with paper.
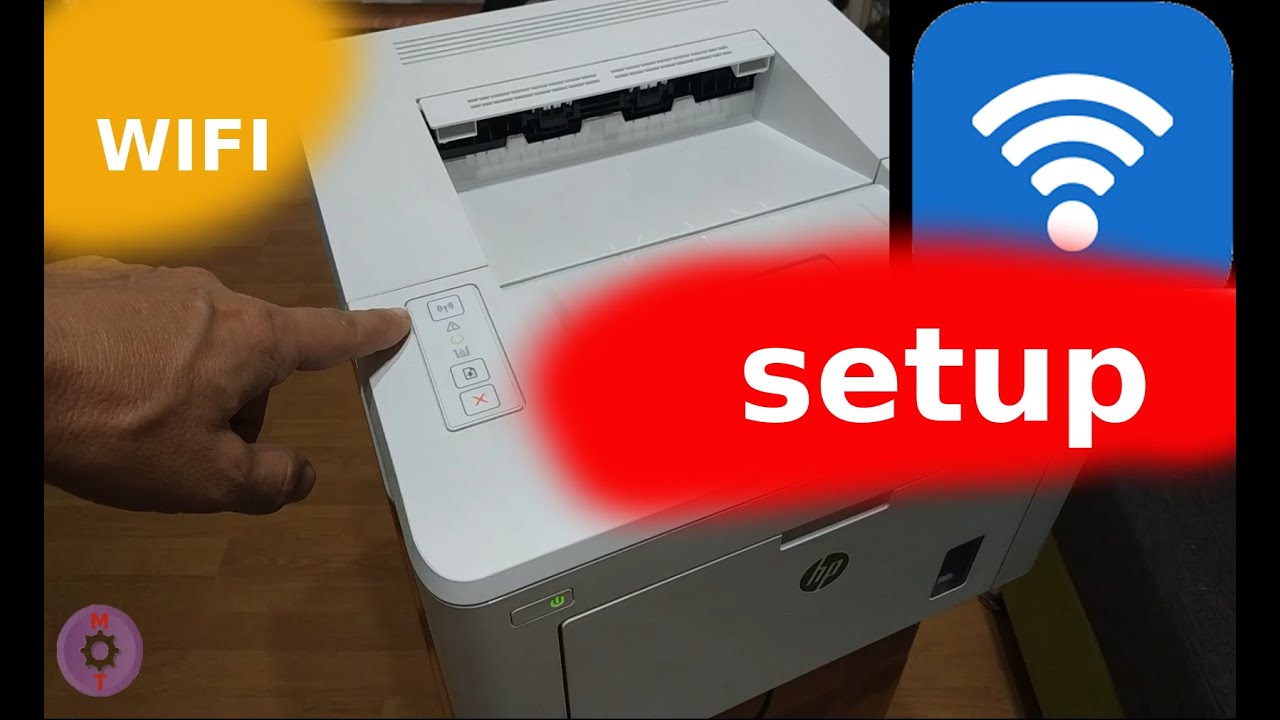
Step 3: Access the Control Panel
- Locate the control panel on your HP printer. Depending on your model, it could be a touchscreen display or a set of buttons and a small screen.
- Navigate to the “Settings” or “Setup” menu on the control panel.
Step 4: Connect to Wi-Fi
- In the “Settings” or “Setup” menu, find the option labeled “Network” or “Wireless Setup.” Select it.
- Your HP printer will scan for available Wi-Fi networks. Once the list of networks appears, choose your Wi-Fi network from the list.
- If your Wi-Fi network is password-protected, you will be prompted to enter the network’s password. Use the on-screen keyboard to input the correct password.
- After entering the password, press “OK” or “Connect” on the printer’s control panel.
Step 6: Install Printer Software (Optional)
- If you haven’t already installed the HP printer software on your computer or mobile device, you can do so now. Visit the official HP website and download the appropriate software for your printer model.
- Follow the on-screen instructions to complete the software installation. The software will automatically detect your printer on the Wi-Fi network.
Congratulations! You’ve successfully connected your HP printer to Wi-Fi, granting you the convenience of wireless printing from your computer, smartphone, or tablet.
Effortless HP Printer Setup on Mac: Connecting to Wi-Fi Made Simple
Setting up your HP printer on a Mac and connecting it to Wi-Fi can greatly enhance your printing experience. In this guide, we’ll provide you with a step-by-step process for seamless HP printer setup on your Mac, allowing you to enjoy wireless printing convenience.
Step 1: Prepare Your Essentials
Before we begin, ensure you have the following essentials:
- Your HP printer with built-in or external Wi-Fi capability.
- A stable Wi-Fi network with an active internet connection.
- Your Mac computer connected to the same Wi-Fi network.
- The power cable for your HP printer.
Step 2: Power On and Prepare Your Printer
- Plug in your HP printer and turn it on. Allow it to complete its initial setup and warm-up process.
- Ensure your printer is loaded with paper and has adequate ink or toner.
Step 3: Connect to Wi-Fi on Your HP Printer
- Access the control panel on your HP printer. This could be a touchscreen display or a set of buttons and a small screen, depending on your model.
- Navigate to the “Settings” or “Setup” menu.
- Look for the “Network” or “Wireless Setup” option and select it.
- Your HP printer will scan for available Wi-Fi networks. When the list appears, choose your Wi-Fi network.
- If your Wi-Fi network is secured with a password, you’ll be prompted to enter it. Use the on-screen keyboard to input the correct password.
- After entering the password, press “OK” or “Connect” on the printer’s control panel.
Step 4: Verify the Connection
- Your HP printer will attempt to connect to the Wi-Fi network. This process may take a moment.
- Once successfully connected, the printer will display a confirmation message. It might also print a network configuration page for your reference.
Step 5: Add the Printer to Your Mac
- On your Mac, click on the Apple menu and select “System Preferences.”
- Navigate to “Printers & Scanners” or “Print & Fax.”
- Click the “+” button to add a printer.
- Your Mac should automatically detect the newly connected HP printer. Click on its name to select it.
- Click “Add” to add the printer to your list of available devices.
Step 6: Test the Connection
- To ensure everything is working correctly, try printing a test page from your Mac. If the test page prints successfully, your HP printer is now set up and connected to Wi-Fi on your Mac.
Congratulations! You’ve successfully completed the HP printer setup wifi on your Mac, connecting it to Wi-Fi for hassle-free and convenient printing.