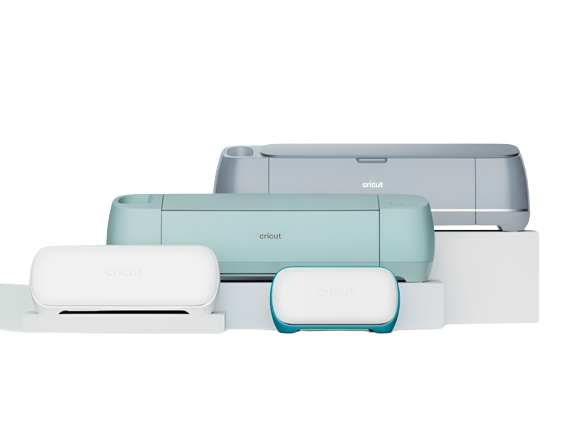
Since the holiday season has officially arrived, it’s the perfect time to learn how to make Christmas ornaments with Cricut. I have been creating crafts with my kids during holidays since they were little. As time goes on, I find projects that will make them excited to work with me. They found my Cricut machine quite impressive, so I came up with projects I could create with my machine.
The possibilities for decorating a home with Cricut Christmas items are endless. Besides, making handmade projects adds a personal touch to the festival. This year, I decided to take things a step up and share my crafting experience with you. In this guide, I’ll teach you how to create Christmas ornaments with Cricut.
Step 1: Cricut App Login and Create a Design
Initiate how to make Christmas ornaments with Cricut by downloading and installing Design Space. After getting the app, I will sign in or create my account using my login credentials.
Alt Text: The Cricut app sign-in window
At the Design Space canvas, I will tap the Upload tool and then select the images given under the Recently Uploads folder. Next, press the Insert Images option appearing at the bottom left-hand side.
Alt Text: Select images from the Recently Uploads section
After getting the images on the canvas, I am going to decrease the image sizes and choose Circle from the Shapes panel. Now, I will change the circle color to white and change its size as per my preference. Afterward, I will right-click and hit Send to Back and insert each of the images inside the circle. Following this, I will change the color of the images from the Color toolbar.
Alt Text: Change a text color from the Color toolbar
Under the Layers panel, I am going to attach each of the layers by selecting the Attach option. After connecting all the layers, I will press the Make It and will proceed towards the next step.
Step 2: Cut Christmas Ornaments Design
After designing your Cricut Christmas ornaments on the app, I will press the Without Mat option. During the how to make Christmas ornaments with Cricut, I will hit the Popular and then choose Smart Vinyl-Shimmer material.
Alt Text: Choose base material for making Xmas ornaments
Now, I am going to unbox the material and add a roll holder to the machine. After doing that, I will insert the material inside it and press the blinking row. The machine will instantly start cutting the Smart Vinyl-Shimmer.
Alt Text: Add the roll holder and load material into your Cricut machine
Step 3: Weed Out Your Design & Apply the Transfer Tape
With the successful completion of the material-cutting process, I will use my weeding tool and remove the extra vinyl from the design. Following this, I will slowly weed the design so that I don’t lose any pieces.
Alt Text: Gently remove the extra material from your design
Next, I clean both sides of my ornament blank with rubbing alcohol. After doing this, I will paint the blank using gold and red color. Here, I will leave a space on the top and bottom of the blank.
Alt Text: Clean the blank and paint it with the color of your choice
Next, I will unwrap the Cricut transfer tape and place it on the top of my design. For proper proportion, I take the scraper tool and brush it over the front and back of the design. After that, I will gently remove the transfer tape and place it on the ornament using the scraper tool.
Alt Text: Place the design on the ornament blank using the scraper tool
Step 4: Assemble Items and Enjoy
At the last stage of how to make Christmas ornaments with Cricut, I am going to cut four pieces of ribbon in equal proportion. Now, I will add the ribbon to the blank, tie a proper knot on the top, and hang it on my Christmas tree.
Alt Text: Cricut Christmas ornaments for Xmas tree
As a result of this blog, I am 100% sure that these customized projects will make my children discover their actual talents. Other than that, they will also help in letting me know about the buyer’s expectations and how I can fulfill them.
Frequently Asked Questions
Question: Which Cricut Accessories Do I Need to Design Christmas Ornaments in 2023?
Answer: To design the Xmas ornaments 2023, all the crafters need to buy some essential supplies. Those accessories will help you to mold the craft as per their choice. Have a look at the list of supplies below:
● Cricut machine
● Cricut cutting mat
● Design Space
● Materials
● Transfer tape
● Ribbon
● Weeding tool
● Scraper tool
● Ornament blank
● Cricut roll holder
● Acrylic paint
● Ribbon
● Paint brushes
Question: How Can I Make Cricut Christmas Ornaments With My Cricut Machine?
Answer: To create personalized ornaments that you hang on your Xmas tree, read the below steps:
- First, log in to your Design Space and start your design on the canvas.
- After that, choose the material and then load it into the machine.
- Once the cutting process comes to an end, start weeding out the design.
- Next, use a transfer tape to stick the design on the blank.
- Following this, remove the tape and tie a ribbon knot on the ornament.
Question: Which Christmas Ornaments Can I Make With My Cricut?
Answer: The DIYer can create numerous types of Christmas ornaments for this festive season out of their Cricut machine. Have a look at some of the famous crafts below:
● Wood slice
● Christmas Gnomes gift tags
● Buffalo checks Xmas ornaments
● Painted glass
● Glitter peppermint
● Wooden house decor
● Flannel Christmas tree
● 3D glitter paper ornaments
● Gingerbread house ornaments
Visit: Cricut New Machine Setup

